Testing Amazon Macie
Introduction
The objective of this post is to do tests with Amazon Macie, building Custom Data Identifiers with REGEX expression to identify sensitive data.
Amazon Macie has a 30-day free trial for bucket-level evaluation. However, pay attention to additional costs. To more information, access: https://aws.amazon.com/macie/pricing/
The information explained in this article is basic and does not represent all Amazon Macie functionalities.
What is Amazon Macie?
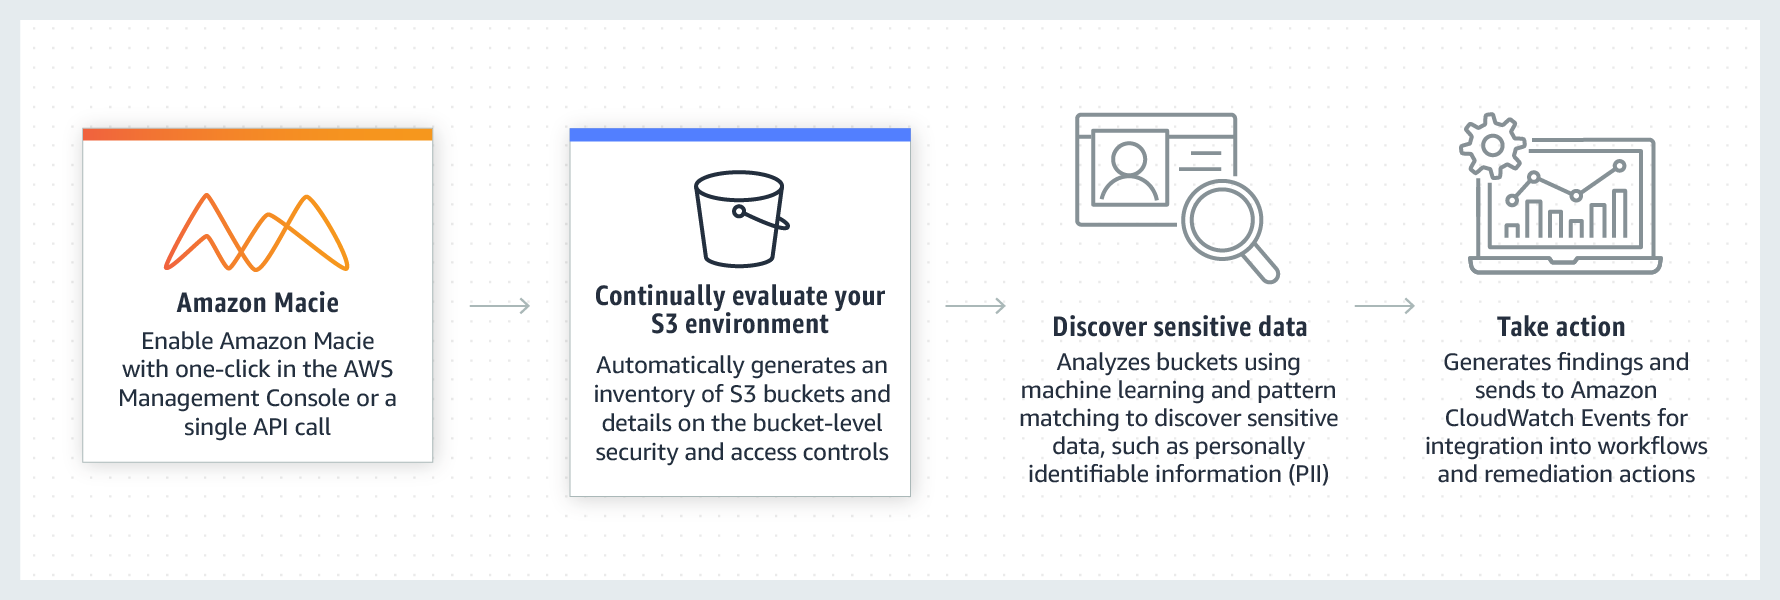
Amazon Macie is a fully managed data security and data privacy service that uses machine learning and pattern matching to help you discover, monitor, and protect sensitive data in your AWS environment.
Macie automates the discovery of sensitive data, such as personally identifiable information (PII) and financial data, to provide you with a better understanding of the data that your organization stores in Amazon Simple Storage Service (Amazon S3). Macie also provides you with an inventory of your S3 buckets, and it automatically evaluates and monitors those buckets for security and access control. Within minutes, Macie can identify and report overly permissive or unencrypted buckets for your organization.
By default, Amazon Macie identifies a lot of sensitive data, but in this test I’ll identify a specific type of data: individual registration (CPF in Brazil).
Steps to use Amazon Macie
- Enable Amazon Macie
- Configure a repository for sensitive data discovery results
- Create a job to discover sensitive data
- Review your findings
Example of use
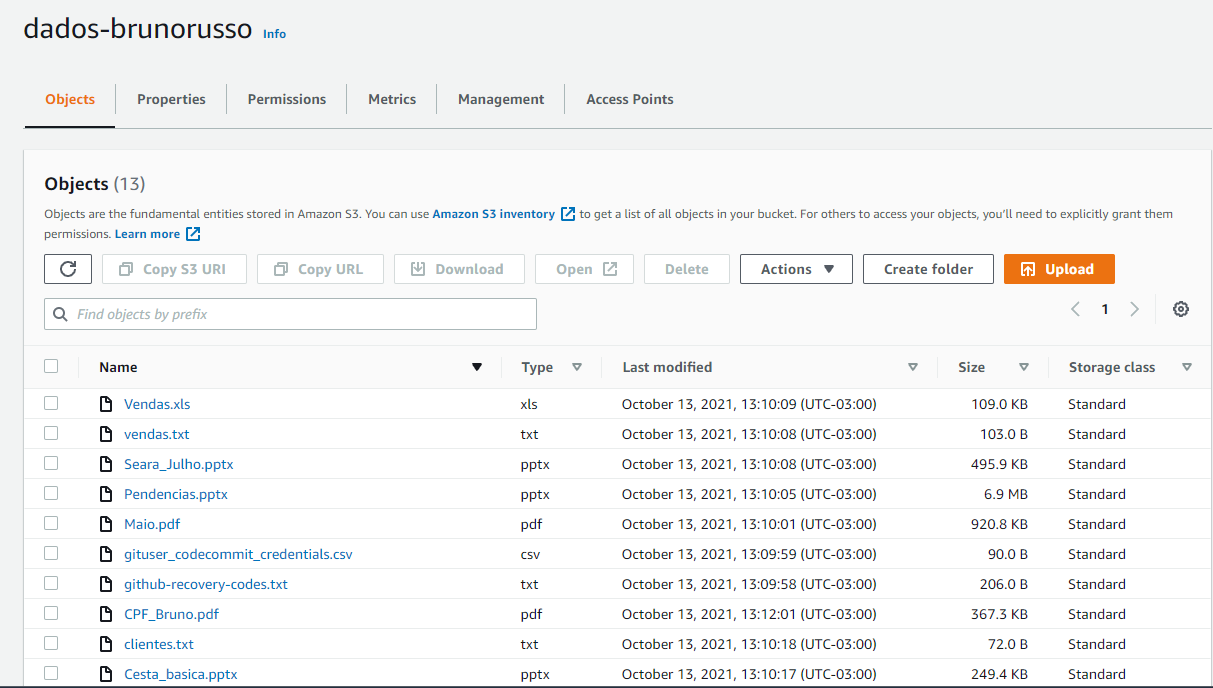
1-) I created a bucket S3 called dados-brunorusso and put some files in this bucket. They are different files, like:
- resume
- personal documents
- bills for payment
- and files with sensitive information like individual registration (CPF in Brazil)
2-) Enable Amazon Macie
1- Look instructions to enable in this link: https://docs.aws.amazon.com/macie/latest/user/getting-started.html 2- After enable, I see this result:
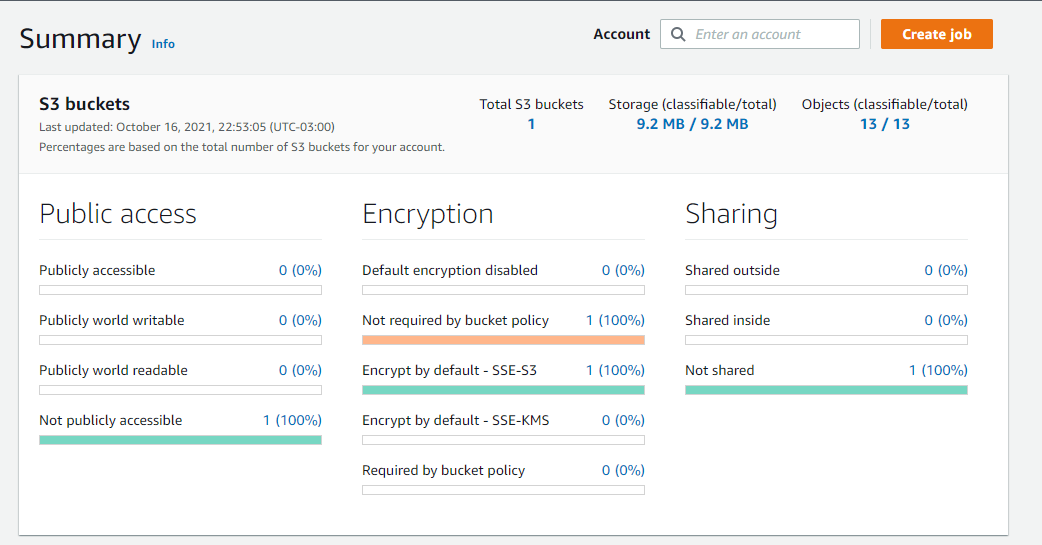
3- Look that:
- The Bucket is not public
- The bucket is with encryption enabled
- The bucket is not shared
3-) Configure a repository for sensitive data discovery results
1- Look instructions to enable in this link: https://docs.aws.amazon.com/macie/latest/user/getting-started.html
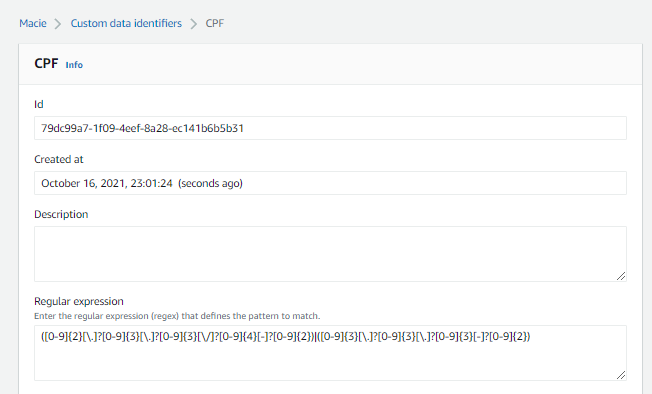
4-) Now, I create a Custom Data Identifier
1- In this step, I create a Custom Data Identifiers to search CPF 2- REGEX, used to detect CPF is:
([0-9]{2}[\.]?[0-9]{3}[\.]?[0-9]{3}[\/]?[0-9]{4}[-]?[0-9]{2})|([0-9]{3}[\.]?[0-9]{3}[\.]?[0-9]{3}[-]?[0-9]{2})

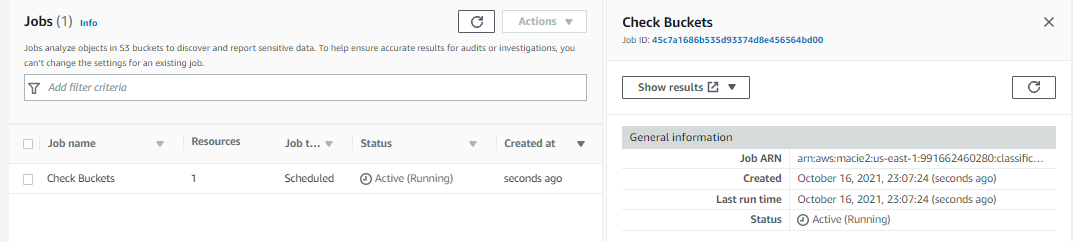
5-) Create a job to discover sensitive data
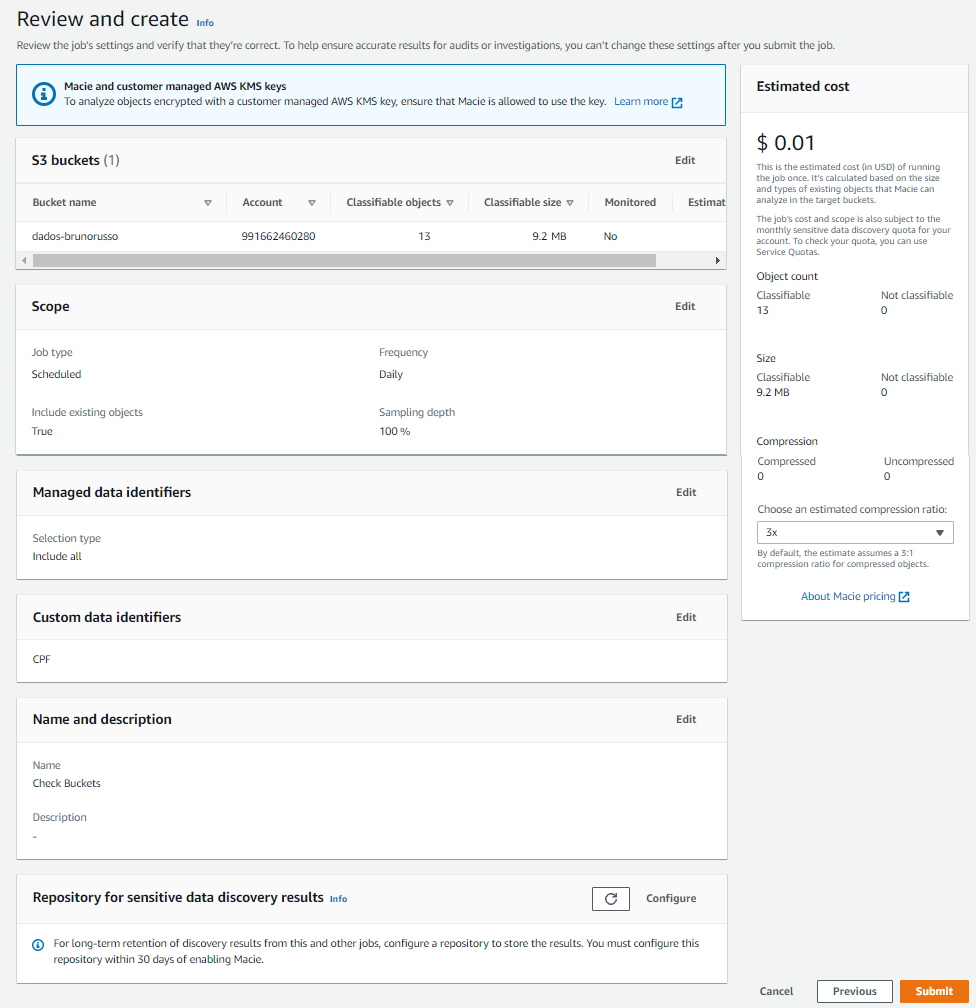
6-) Now, the job created is running
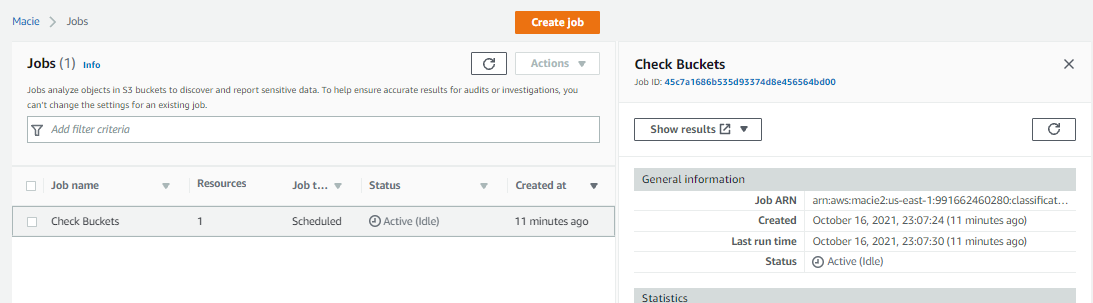
7-) Is necessary wait some minutes for job complete
8-) After 11 minutes the job was completed
9-) The results can see on Summary menu

10-) Look in Top finding types are three types
1- SensitiveData:S3Object/Personal 2- SensitiveData:S3Object/CustomIdentifier 3- SensitiveData:S3Object/Multiple
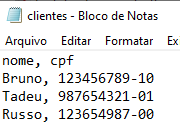
11-) The file clients.txt have sensitive information and identified by REGEX created on step 4
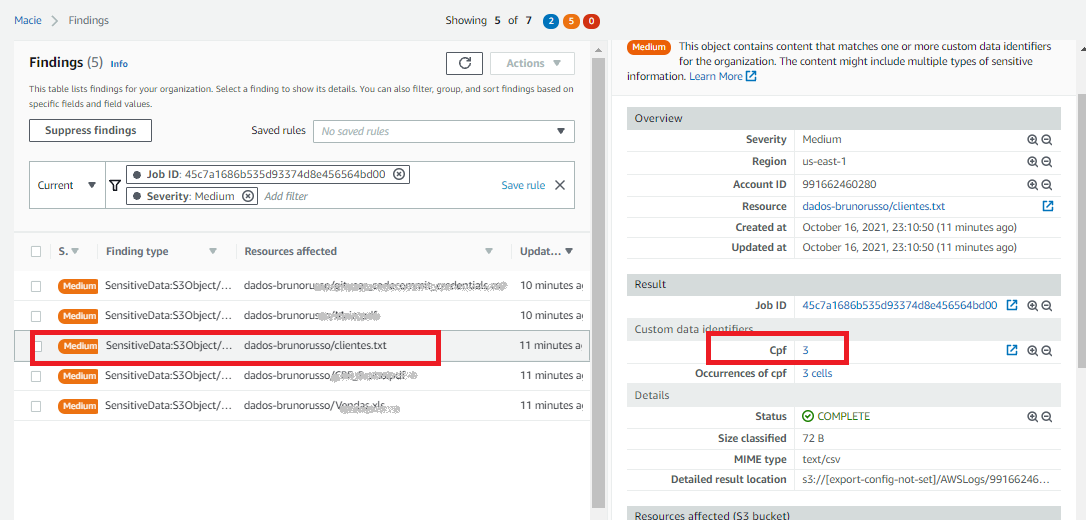
12-) The occurrences can see
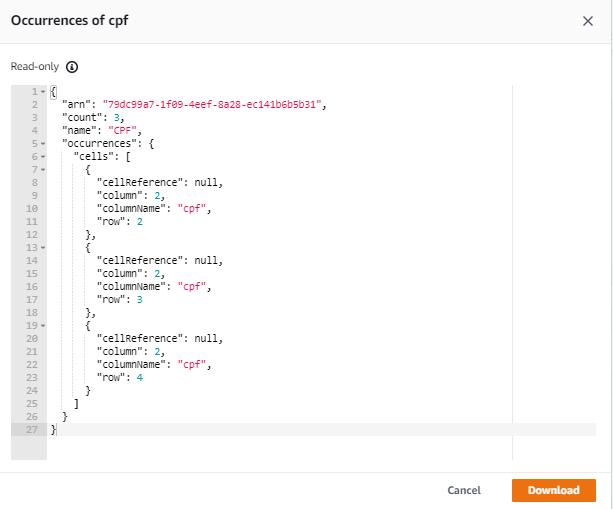
13-) Look the file content do check information
Warning!
After the test, I disable Amazon Macie to not be charged.